
Following up on my How to Set Up an Email Client article, you will need to make sure you get the following information from the hosting company:
- Incoming mail server and port.
- Outgoing mail server and port.
- Username
- Password
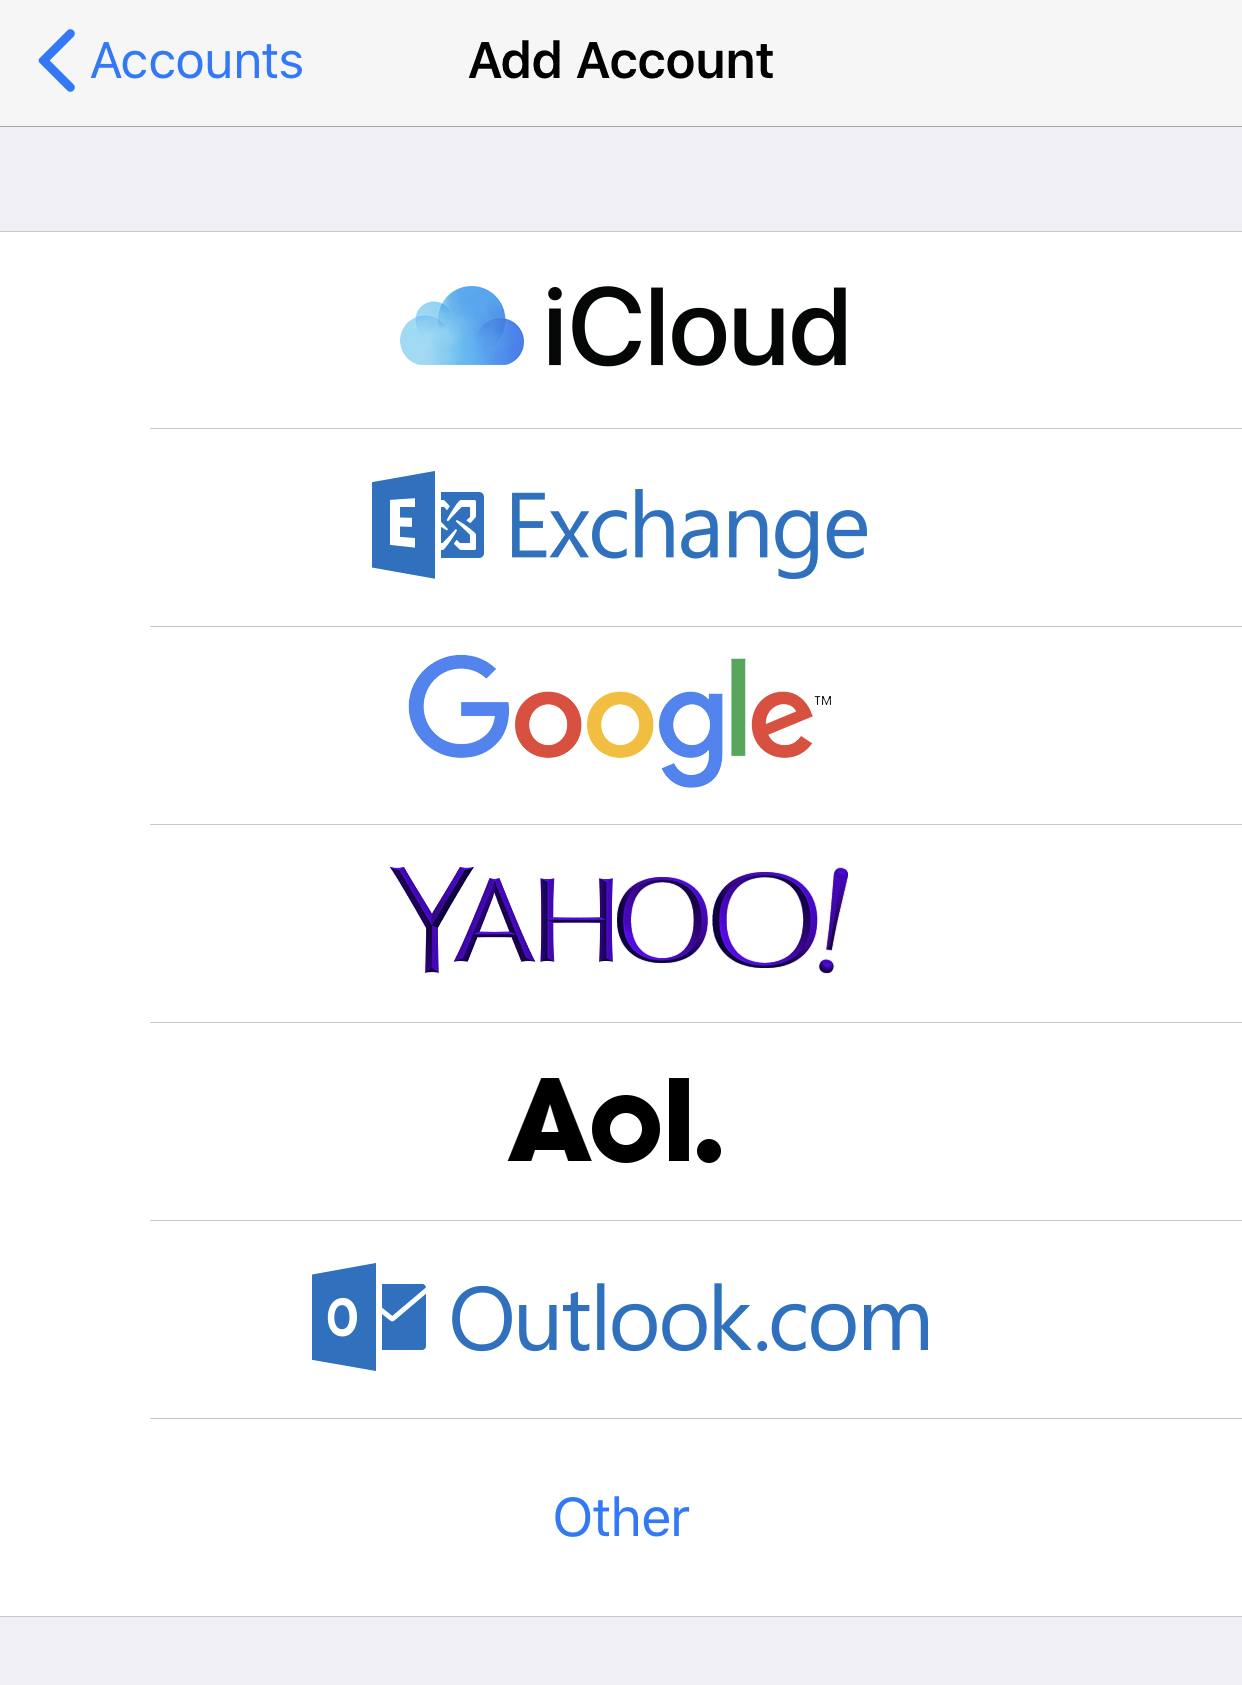
Once you have this information you can go to settings > Accounts and Passwords > Add Account.
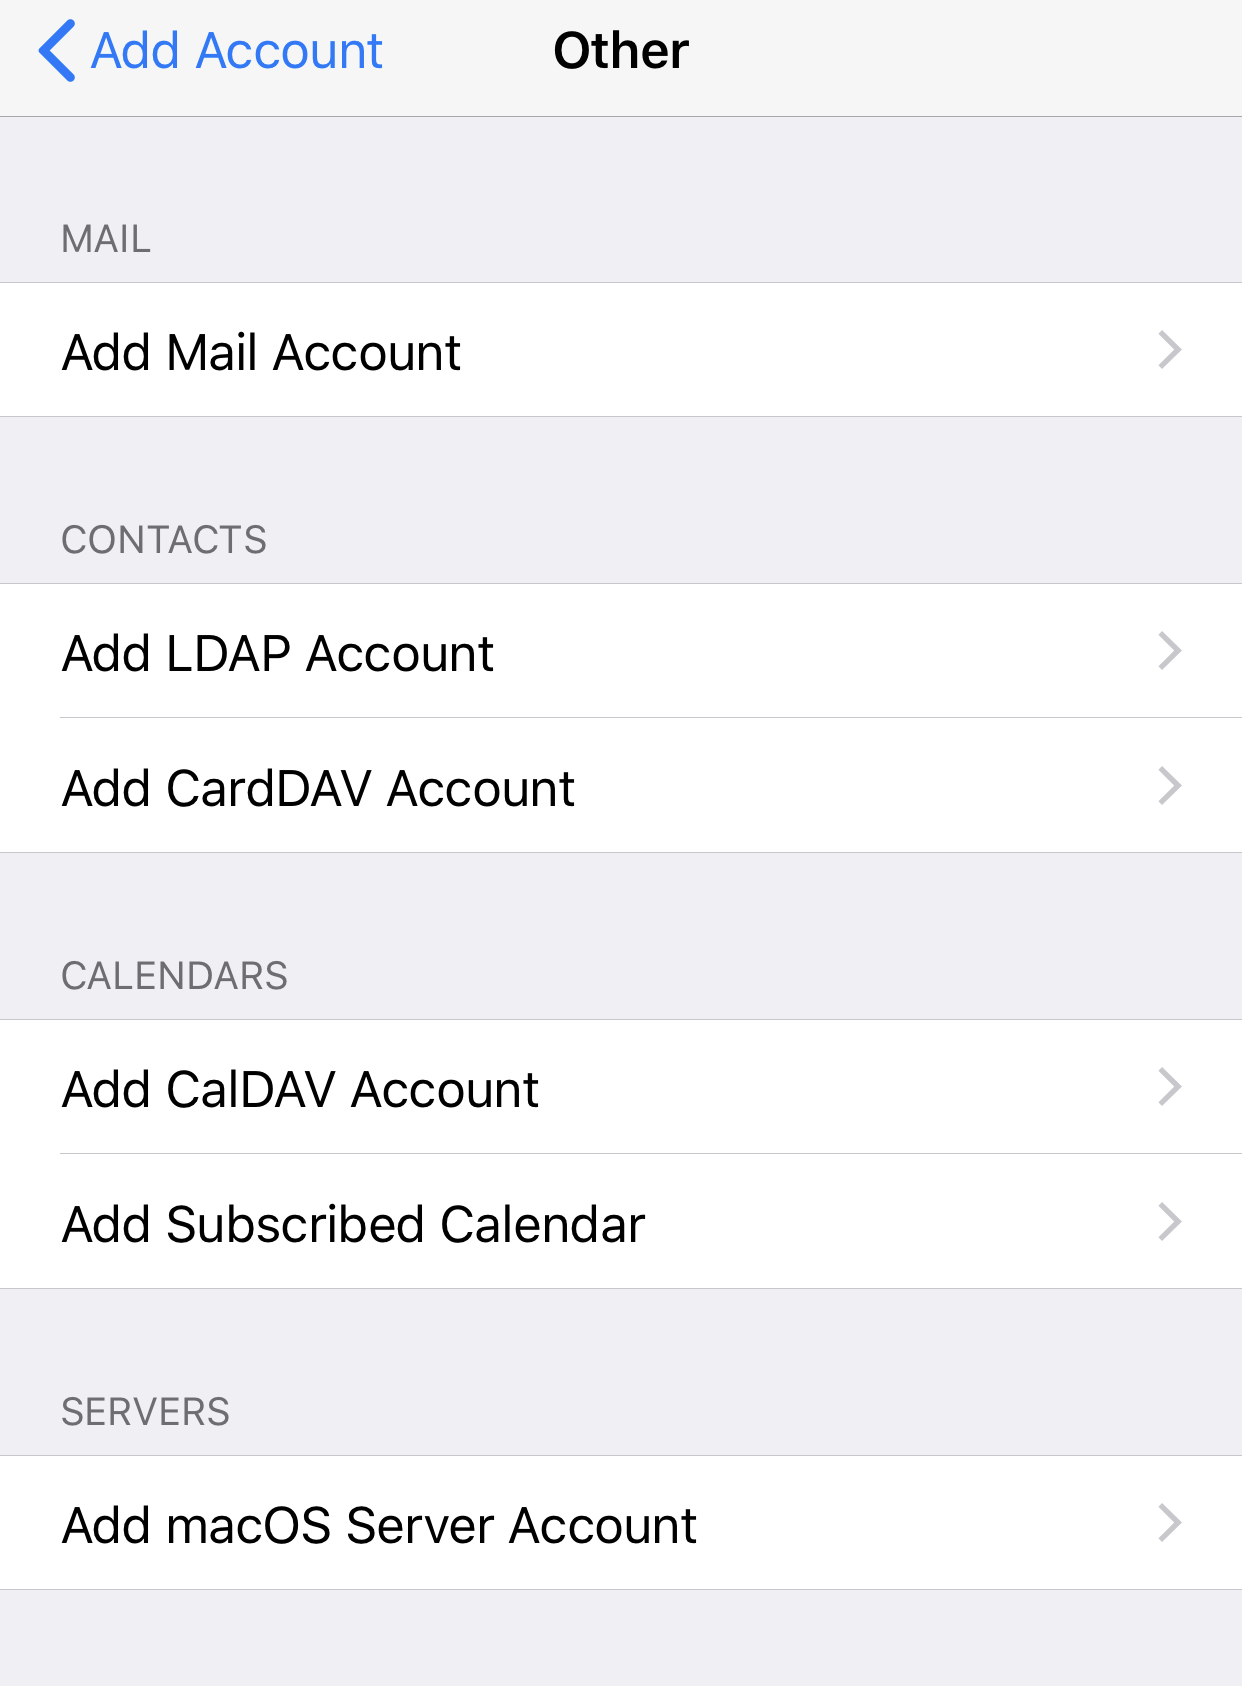
You will then need to select Other.
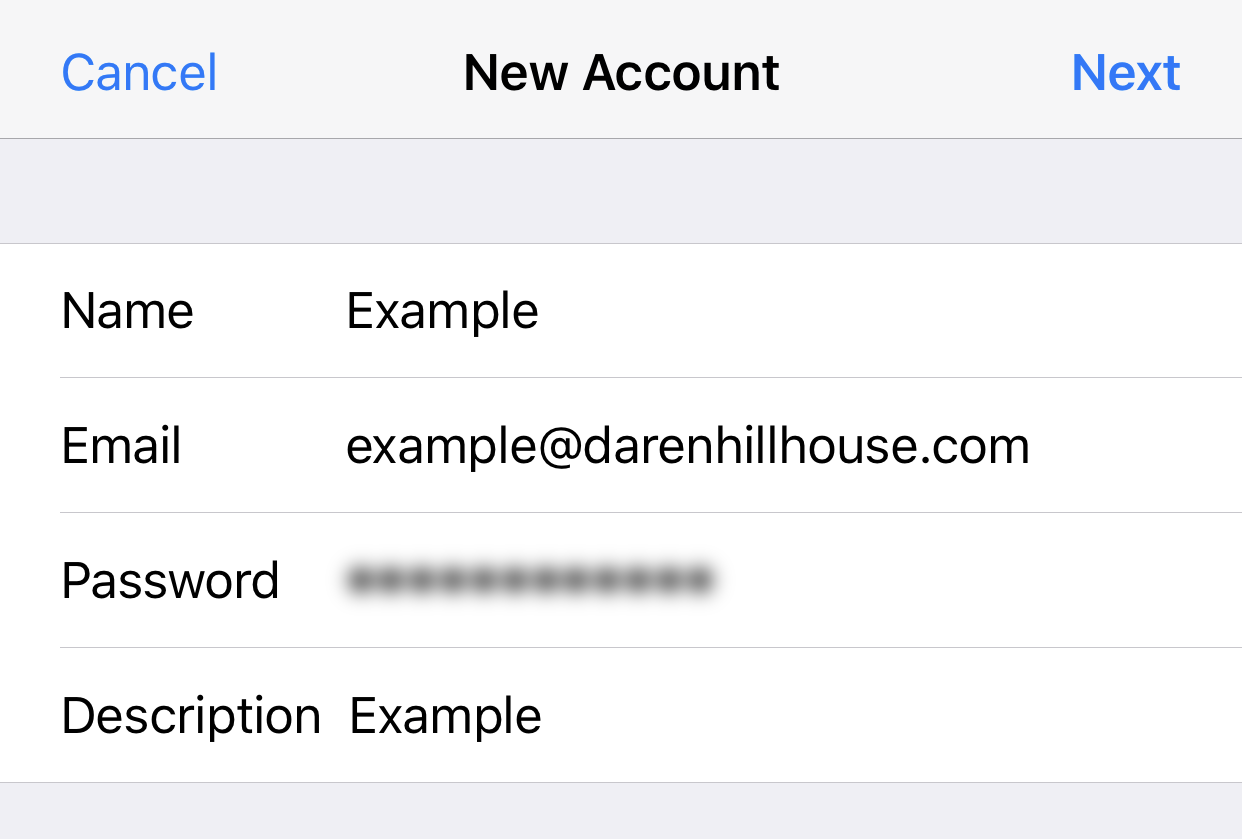
Fill in your Name. You will need your Email Address and Password from the account settings. The description is what it will be listed as in your list of mail accounts. Once filled out you can hit Next.

Fill in the missing information the incoming and outgoing mail servers. This is also whether you decide on whether you want an IMAP or POP account. If you’re not sure, you can go to Email Access POP3 Vs. IMAP this will help you determine what kind of account works for your needs.
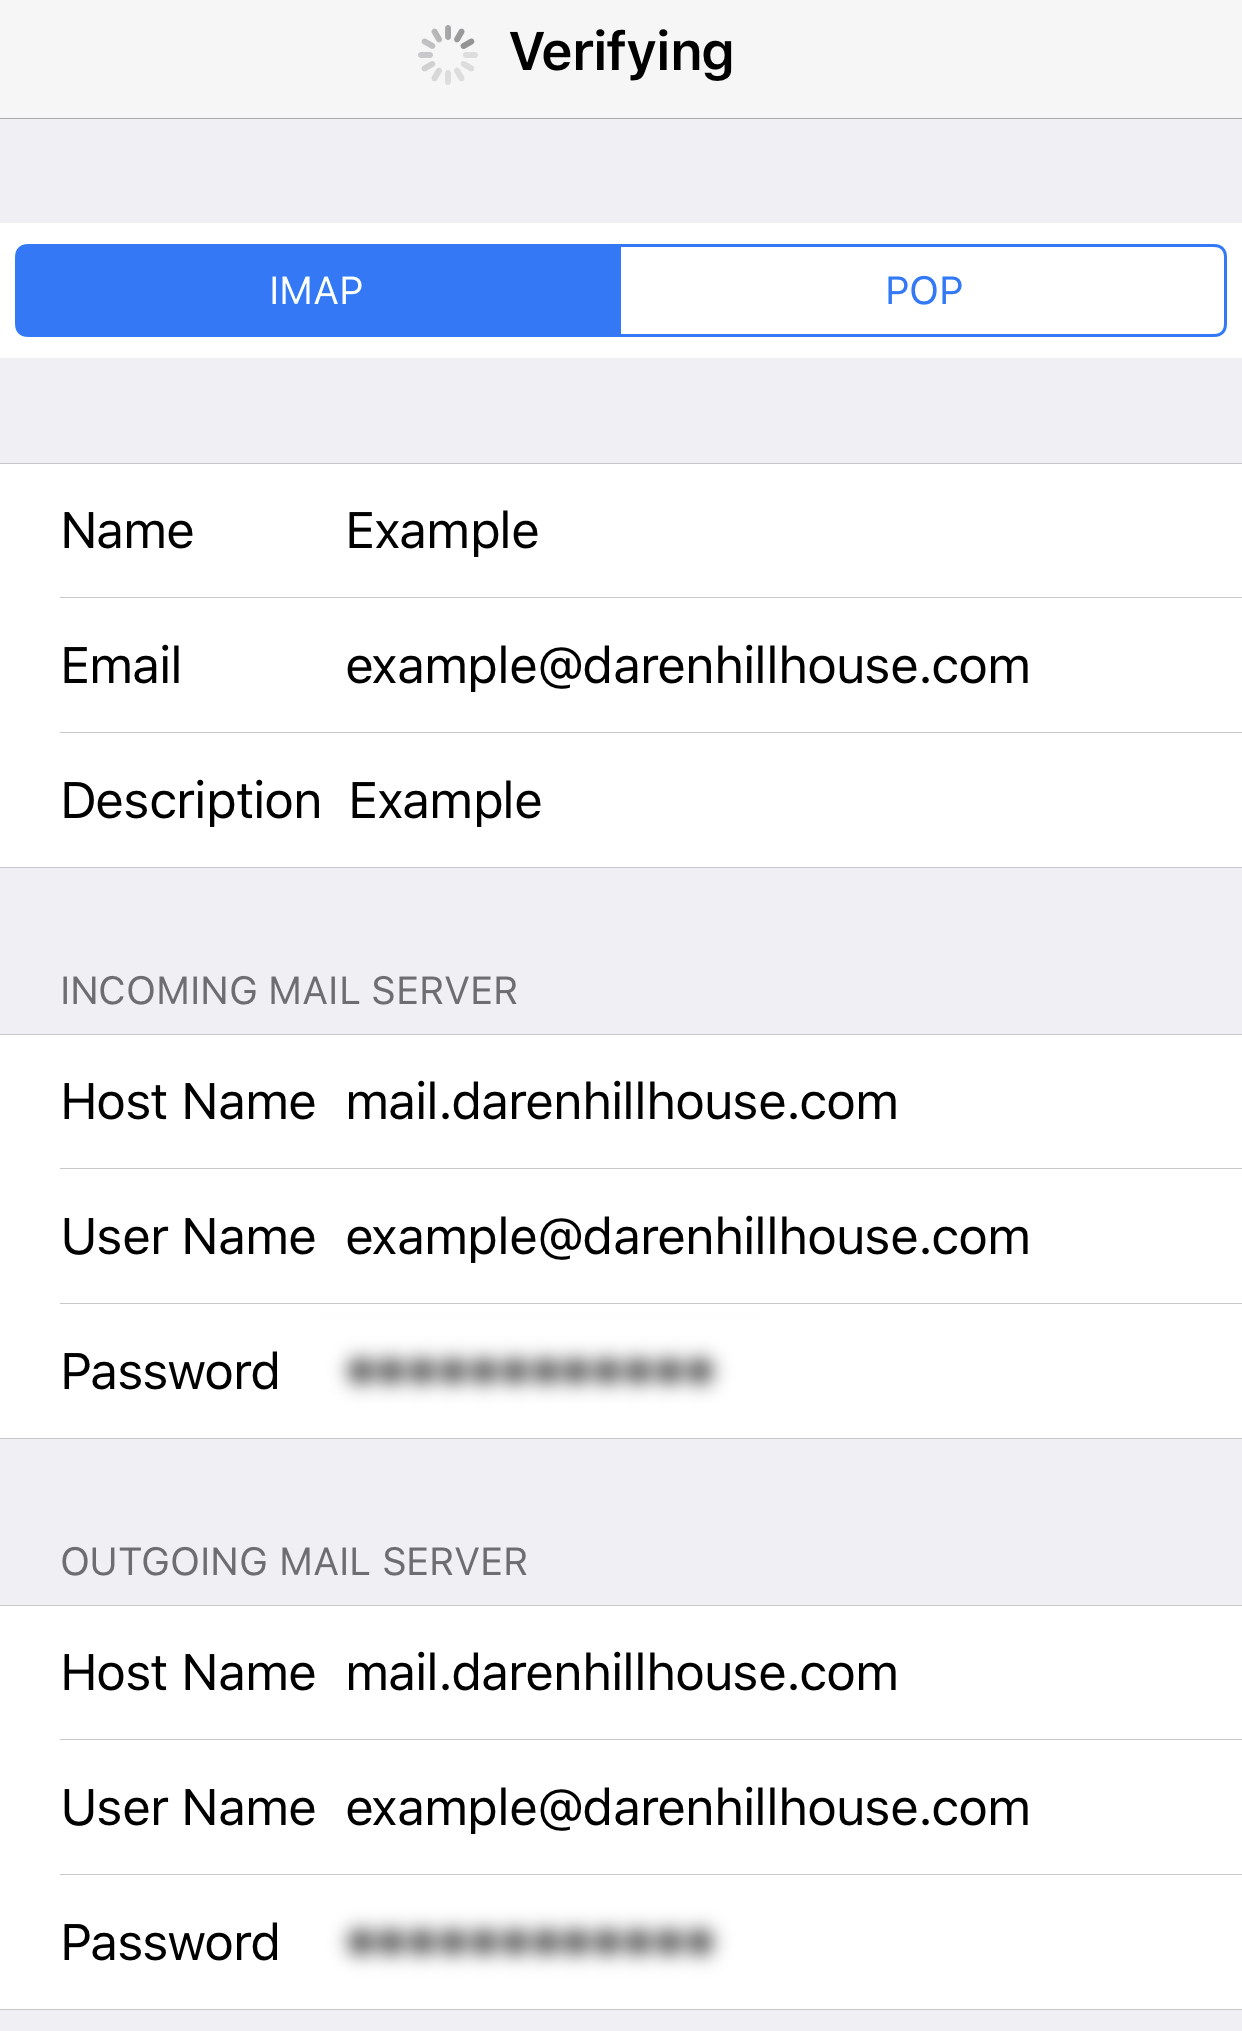
A couple things to note. The User Name is the full Email address. Also, iOS says the Outgoing Mail Server settings are optional, however, if you don’t fill them out it won’t work.
Once it’s completed the verification process, it may give you an error if you’re not using an SSL. You can continue through that, and your email will function normally.

The final step is to save the account and the settings. Once you have saved the settings you can go to your mail app and view all of your mail. If you are using POP, it may take a few minutes to download the mail.
You can also go to the Mail Settings and change more settings such as the Preview. With this, you can tell it how many lines you want it to display when showing your mail.
If you have any questions please feel free to Contact Me.